FAQ’s Alarms in General
These models are now discontinued so the replacement for these would be HSSA/PE or HSSA/PE/FF.
It isn’t recommended as the different components used in other branded alarms can cause interference which can cause more false alarms and reduce the overall lifetime of the alarm.
Ensure all of the dip switches are in the same orientation, this will automatically link the devices and no further action is required.
On this particular model the switch doesn’t do anything so can be disregarded, we just use the same mould design on all of our RF mains alarms.
Out of the box, no it isn’t, however, if its mounted to a BESA box with gaskets supplied then it can be made to be.
No, it can be interlinked with the final alarm through the hard-wired interlink terminal along with a “Live” and “Neutral”.
There could be some contamination in the sensor of the alarm, potentially from dust or a small insect, causing the device to falsely activate. To remove this contamination, using a hoover go around the edges of the alarm, without opening it. Or if possible, using a clean compressed air can held from 500mm away blow at the alarm to remove any potential contamination from the sensor.
To test one individual detector , press the test button on the front of the unit for 3 seconds. In order to test the link between detectors press and hold the test button from any unit until all other detectors are activated , this is usually between 4 – 10 seconds.
FAQ Battery RF10-PRO Alarms
Press the TEST/SILENCE button on your CO alarm twice with a small pause (1 Second Pause) in between the presses for example PRESS-PAUSE-PRESS the alarm should then flash RED 3 times which means it is now paired to the system.
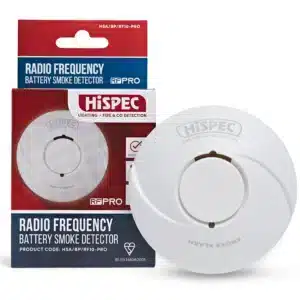
Turn the device on by locating the black activation switch which is located on the back of the device near the top in a “keyhole” shaped slot and slide the switch up. (This would automatically activate when mounted to the screw on the wall)
Keep the “Test” button held down for 20 seconds as it can take 20 seconds to send the signals to the other interlinked devices in the system. Or if the customer has a control unit press the “Test” button.
The radiofrequency can interlink up to 30 metres in a home or up to 80 metres in an open space.
Yes! As long as the alarm has RF10-PRO in the product code then it will interlink wirelessly with any other RF10-PRO Alarm.
You can have up to 20 alarms in any wireless interlink system.
The device that has set the rest of the system off will be flashing rapidly whereas the others will just be sounding.
The device’s battery is coming to end of its lifetime so the whole unit needs replacing, if the unit is under 5 years old it should be returned to the electrical wholesaler it was bought from for a replacement under warranty.
One or more of your interlinked devices could have some dust/debris in the sensor causing it to false alarm therefore take the devices down and clean them out with a vacuum cleaner with a brush attachment or similar.
To pair the new device into the existing system, put one of the existing detectors into pairing mode by holding the black button on the back for 5 seconds (the LED on the front will illuminate for 30 seconds). Then whilst this LED is illuminated, press the black button on the back of the new detector twice (the LED will flash 5 times). All of the devices should now be paired including the device which are still installed.
FAQ Mains RF10-PRO Alarms
On the side of the baseplate there is a small rectangular button which is used to pair all devices together.
Yes, if the alarm has RF10-PRO in the product code then it will interlink wirelessly with any other RF10-PRO alarm.
No, they won’t interlink through radiofrequency, but they will interlink together if you hardwire them using the interconnect terminal.
Make sure to keep the test button held down for 20 seconds as it may take up to 20 second to send the signal to the other devices.
Yes, if you want to provide a bridge between the non-RF alarms and RF10-PRO battery only alarms you can replace one of your current mains alarms for a RF10-PRO mains, then radiolink the Battery alarm to the mains. (When testing it can take up to 1 minute for all devices to receive signals and then sound together).
Check that mains power is active by ensuring the green light on the front on the alarm is lit.
If the green light is lit leave the alarm to charge for 24 hours and press the test button once to silence the beeping for 10 hours.
Have another enquiry?
Please email customerservices@hispec.co.uk or call 01257 262197.
"*" indicates required fields


